This topic was published by Jarret Buse and viewed 3522 times since "". The last page revision was "".
- AuthorPosts
If you have read Part 1 of this series, you should have a basic understanding of the Level Editor's use. In this article, I hope to go a little deeper in the layout of a level.
Creating World Maps is not as complex as creating Levels. The World Map is a large map with paths which allows Tux to travel around. Along the path may be "dots" which represent levels. To pass a "dot" and continue on the path, you need to complete the level.
Make sure you select Properties form the Level menu and give your World Map a name. The tile sets include:
- tiles.strf – general default tile set
- worldmap.strf – used to create world maps
- ice_world.strf – various tile sets of caverns, castles and ice
NOTE: If you change the TilesetFile, you need to save your world, exit and reload it.
When creating a world map, look at the top-left box next to the tool icons. Right-click on all items and delete them, except for the Interactive and Objects layers.
In a world map, you should not need a background. Once your Interactive layer is complete, then add the Foreground layer.
NOTE: If the yellow boxed Spawn Point is still on the screen, right-click it and select delete. A different spawn point exists for the World maps.
OK, let's go through an example.
Open Level Editor and select Level > New.
Right-click the yellow Spawn Point and select Delete. Select Background and Foreground in the top-left box to the right of the icons. Delete both of these items as well. On the menu, select Level > Properties. Give the level a name like "The New Land". Scroll down and change the TilesetFile to "images/worldmap.strf".
On the menu, select Level > Save As... Got to /usr/share/games/supertux2/levels. Create a new folder called "New Land". In the bottom right corner, make sure the option is changed from Supertux Levels to Supertux World Maps. Name your world the "The_New_Land.stwm"
At this point, close the Level Editor and re-start it to re-open your new world map. You can also load a different map then reload the new world map. Bot options have the same effect to cause the Tileset to initialize.
At this point create your world. Realize that Tux can only pass along paths you create.
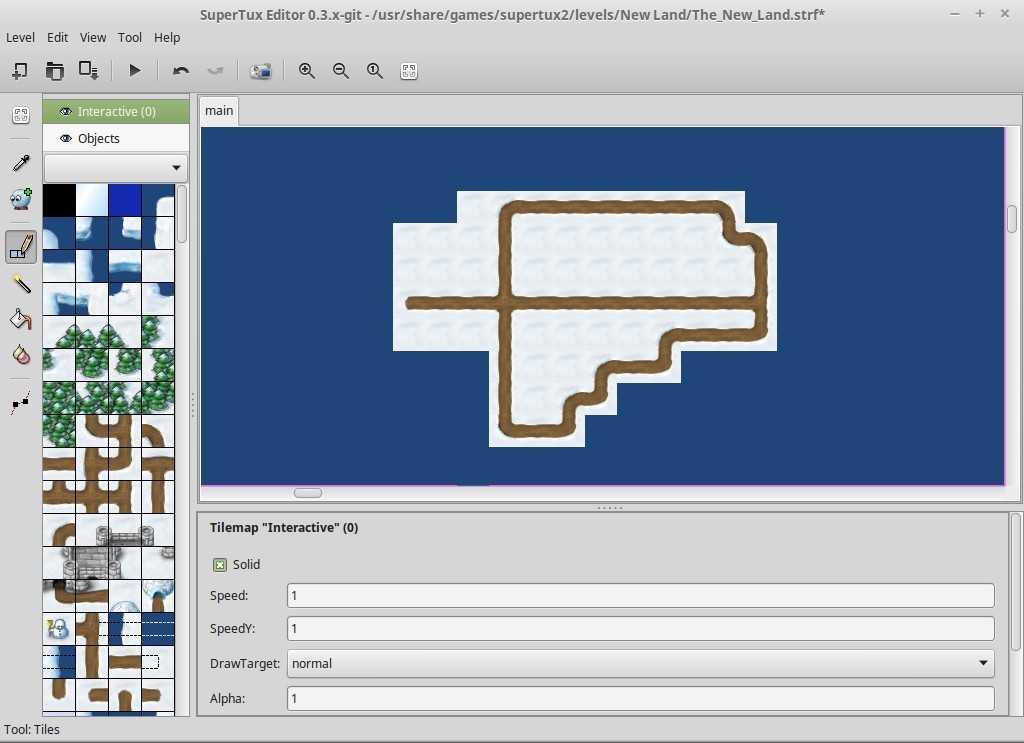
Once the world is opened, select the blue block (third on the top) and fill in the map to appear as water with the "Fill Tool". Then select the "Tiles Tool" and a tile which is filled in snow (third row and four blocks over). Create a small island area of snow and then use the paths to create a route for Tux to move around (as shown in Figure 1).

Figure 1 Now, select the "Objects Tool" icon. Select Tux in the second row first ison. If you hover the mouse over it, a tooltip should appear saying "WorldmapSpawnpoint". Select Tux and place him on the map's path. In the lower section of Property information, give the spawn point a name of "main". Save the world map.
Select the upper icon of the "Play Current Version" (the triangle on its side) to open your world map in Supertux and see what you created.
NOTE: My world is included on this page to download.
Sample world - https://dcjtech.info/wp-content/uploads/2015/06/The_New_Land.stwm
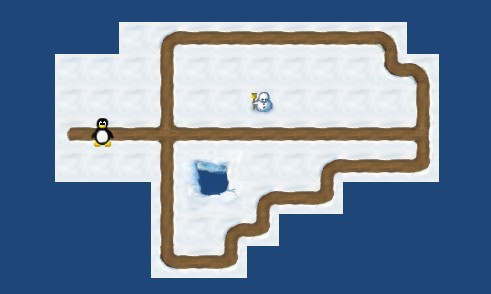
Once this is completed, you can add the Foreground Layer to add more visual details if needed. To add the Foreground Layer, right-click in the box with Interactive and Objects. Select "Add". A new layer is added and you need to go to the lower pane which is the properties for the new layer. Set the Layer number to 100 to be in front of the Interactive Layer. For the Name, enter "Foreground". Save your new world. Figure 2 shows an example with a Foreground.

Figure 2 In the next article, we will look at adding levels to the world map.
Further Reading
- Supertux Level Editor Articles (List) - https://dcjtech.info/topic/gaming
- AuthorPosts


